【Rails】ネストされた子要素の新規作成・一覧表示・編集作業を考える。
スクールでネスト(入子構造)に関して学んだ事は
新規作成(new,create)ぐらいで、実際は詳細や編集、削除だってするだろうし
そんな時ってどうするんだろう。
と言う訳で、今回はそんな苦悩のお話です。
ぶっちゃけ、すっごい初歩的な事で自分の恥を晒す様でむず痒いのですが
初心者なんてこんなもんと開き直って書いていきます。
目次
1. 前提条件
customer(お客様:親)モデルと、product(商品:子)の二つのモデルを作ります。
先ずはモデルです。こちらは親モデルのcustomer
class Customer < ApplicationRecord
has_many :products, dependent: :destroy
end
こちらは、子モデルのproduct
class Product < ApplicationRecord
belongs_to :customer
end
バリデーションとかは省略しています。
ポイントは「dependent: :destroy」でしょうか。
親モデルのcustomerを削除すると関連するprodcutも消してくれます。
マイグレーションは割愛してお次はルーティングです。
ポイントは
ルーティングのネストですね。
customerコントローラーのルーティングの中に、
prodcutコントローラーのルーティングを記述しています。
ターミナルにて「rails routes」で状態確認。

よしよし、ちゃんと親子関係になってる。嬉しい。
お次のコントローラーは後述するので飛ばします。
最後はビューですね。
<div class='account-page' id='account-page'>
<div class='account-page__inner clearfix'>
<div class='account-page__inner--left account-page__header'>
<h2> Index Products</h2>
<h5><%=@customer.name%>様の取置商品一覧</h5>
</div>
<div class='account-page__inner--right'>
<div >
<ul>
<% @products.each do |product| %>
<li>
<div class='customer_index_list'>
<div class='customer_index_list_header'>
定期 : <%= product.name%>
</div>
<div class='customer_index_list_footer'>
<div class='customer_index_list_footer_left'>
取置冊数:<%= product.num %>
</div>
<div class='customer_index_list_footer_right'>
登録日:<%= l product.created_at %>
</div>
</div>
</div>
</li>
<% end %>
</ul>
</div>
</div>
</div>
</div>
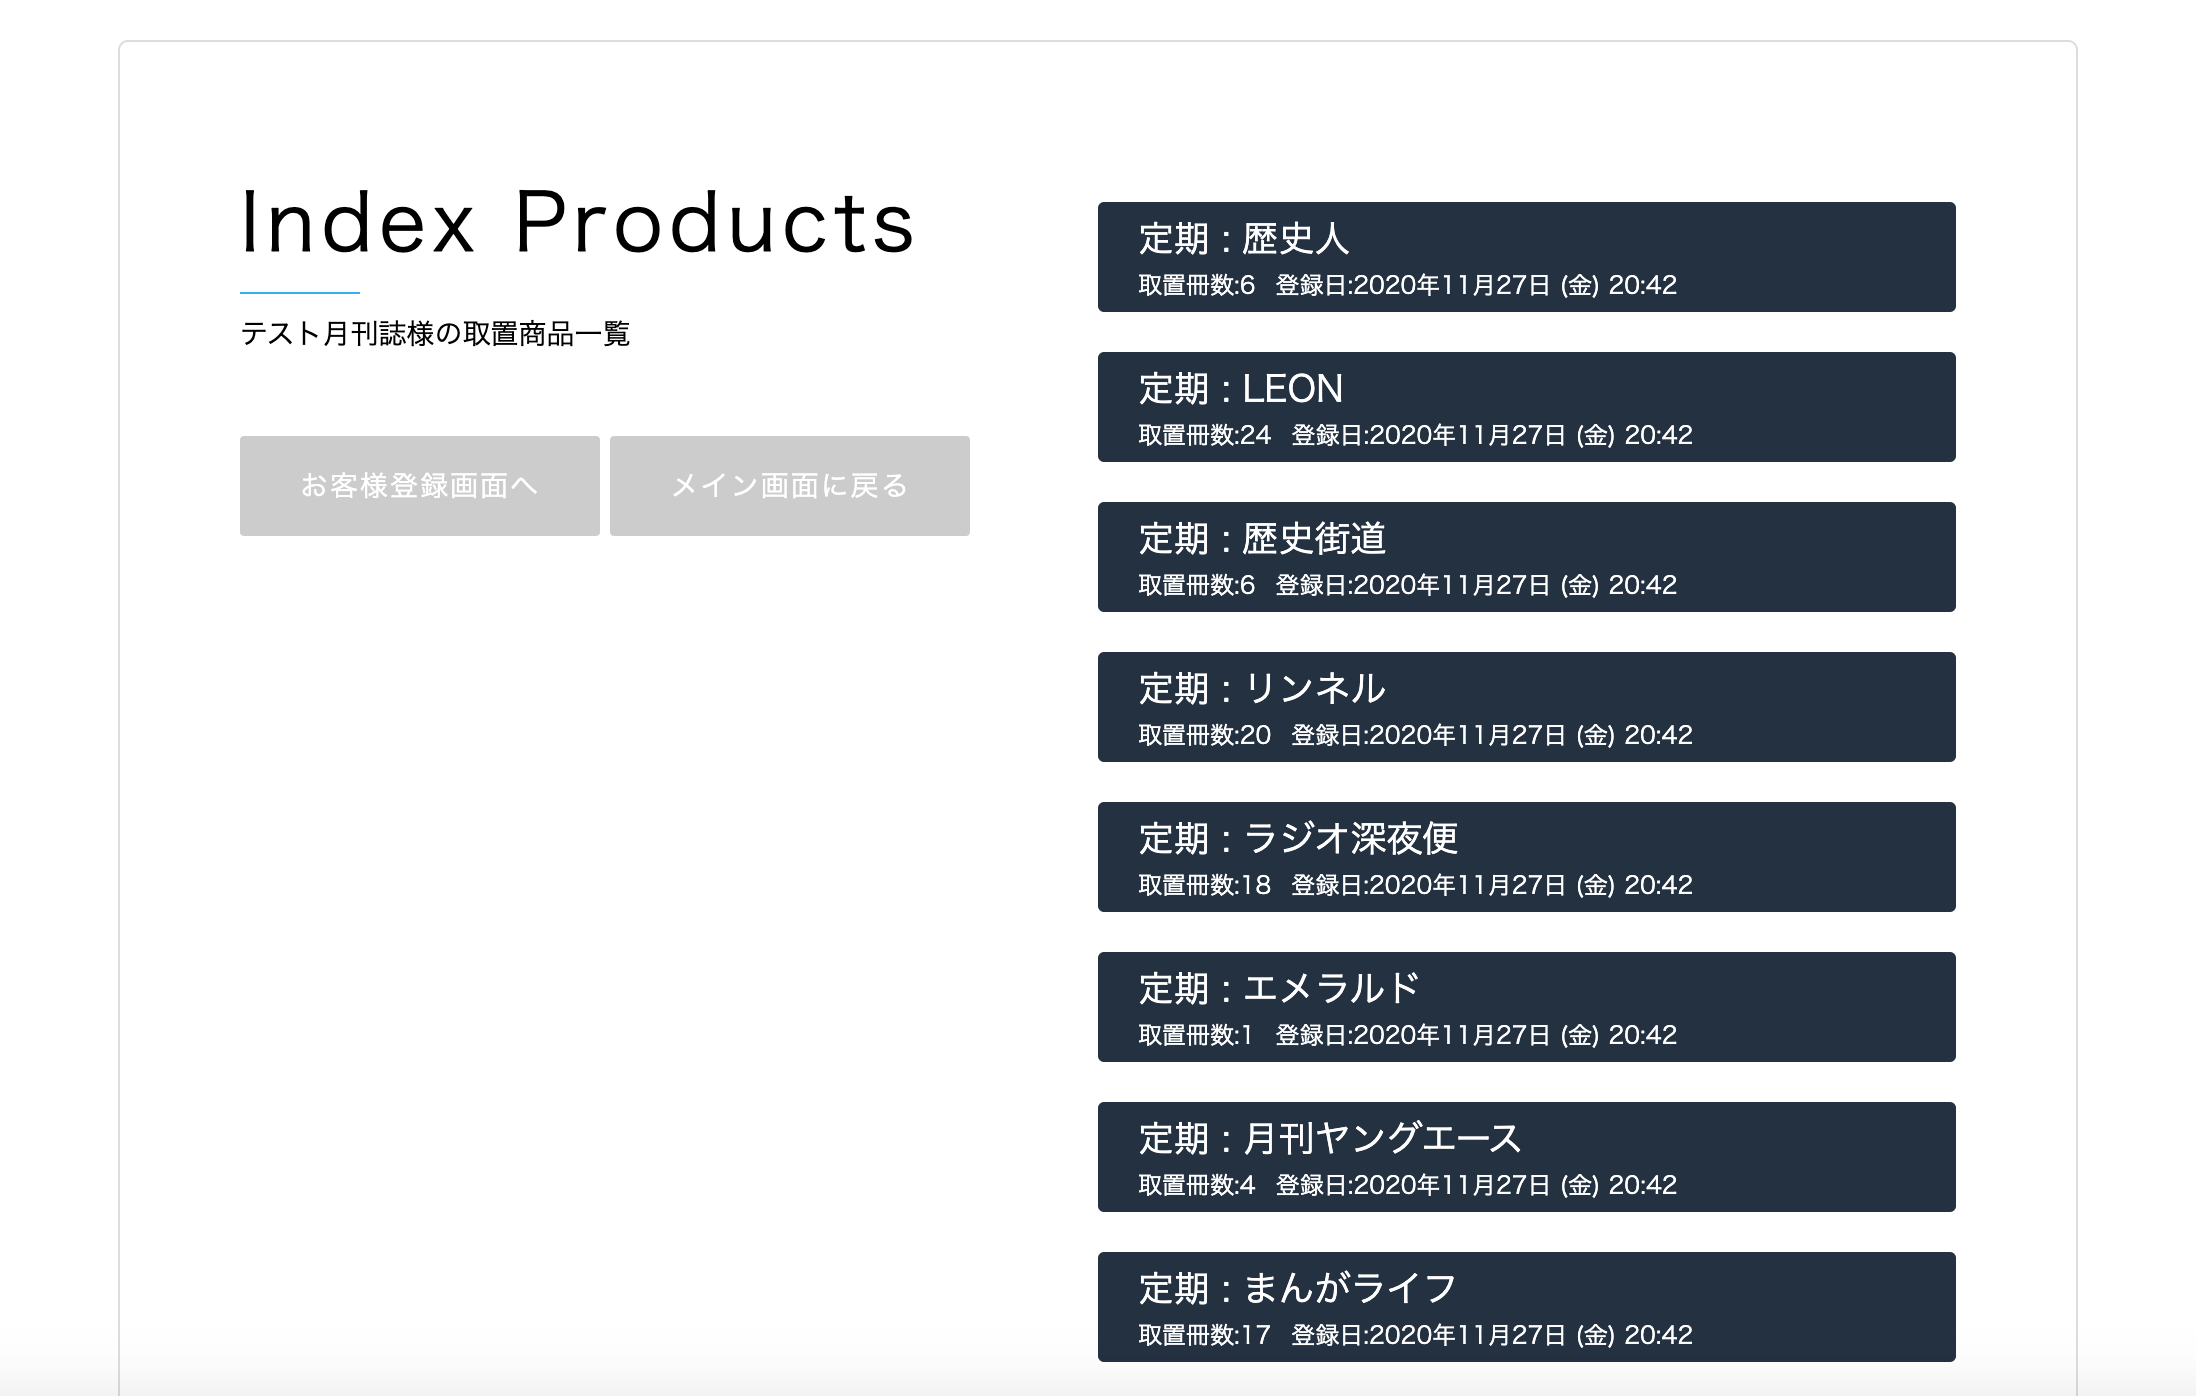
CSSをいじって最終的な見た目はこんな感じにしたいな〜。
それにしても前置き長いですね。ごめんなさい。
ただ、今まで他の方のブログや、キータを拝見させていただいて
私が不勉強なばっかりに解らないことが多かったので、
出来る限り前提条件とかそう言うものも含めて記載した方が、
イメージしやすいのかなと思いまして長々と書いております。
2.「new」「create」のコントローラーとビューを考える。
2-1.newとcreateアクション
モデルとテーブルは前提条件で作り終えたので
先ずは新規登録と一覧表示のアクション内容・遷移先の記述をしていきます。
アクションはこんな感じです。
class ProductsController < ApplicationController
def index
@customer = Customer.find(params[:customer_id])
@products = @customer.products.all.order('created_at DESC')
end
def new
@customer = Customer.find(params[:customer_id])
@product = Product.new
end
def create
@customer = Customer.find(params[:customer_id])
@product = @customer.products.new(product_params)
if @product.save
redirect_to edit_customer_path(@customer), notice: "#{@customer.name}様の取置商品を登録しました。"
else
render :new
end
end
private
def product_params
params.require(:product).permit(:name, :z_code, :num, :release).merge(customer_id: @customer.id)
end
end
新規登録画面を作成し、そちらで登録作業を行うことにしたので
「index」「new」アクションを定義します。
- 親であるcustomerのidはパラムスの中に入っているのでこちらを取り出します。
「create」アクションでは
- 「@customer.product.new(product_params)」とすることで、どの顧客(@customer)に対しての商品(product)を作るのか指定しています。
- ストロングパラメーターも利用します。渡されたparamsの中にproductというハッシュがある二重構造になっているので、requireメソッドの引数に指定して各カラムを取り出しcustomer_idカラムには、親のidとなる@customer.idをmerageでくっつけます。
2-2.「notice」と「alert」
あんまり関係ないのですが、補足説明として。
「notice:」は直訳すると通知と言う意味で、保存が成功したらフラッシュで成功した事を教えてくれます。
本来であれば下記が正解らしいのですが、
def create
@customer = Customer.find(params[:customer_id])
@product = @customer.products.new(product_params)
if @product.save
redirect_to edit_customer_path(@customer)
else
render :new
end
end
こちらの短縮系ですね。ちょっとスッキリです。挙動に違いはありません。
反対の「:alert」もあるのですが、
バリデーションでのエラーメッセージを返す様にしているのでこちらは省略。
ちなみに、保存に成功すると

こんな感じでお知らせしてくれます。
個人的に、Sequel Proで確認しないと落ち着かないので
付けてる意味あるのかって話ですが、多分意味はあるはず・・・。
2-3.遷移先の記述。
コントローラーは終わったので、お次はビューですね。
今回は、親(customer)の編集画面から子(product)の登録画面へ遷移する様にしています。
app/vews/customers/edit.html.erbに
<h5><%=@customer.name%>様の情報を編集</h5>
<%= link_to "取置商品登録画面", new_customer_product_path(@customer), class: 'btn'%>
<%= link_to "取置商品一覧画面", customer_products_path(@customer), class: 'btn'%>
ルーティングのパスに親の情報「@customer」を付けて渡しています。
3.「edit」と「update」のコントローラーとビューを考える。
いよいよ、正念場。
スクールのカリキュラムには例が載っていないところです。出来るのか、ワシ!
3-1.「edit」と「update」アクション
class ProductsController < ApplicationController
def edit
@customer = Customer.find(params[:customer_id])
@product = @customer.products.find(params[:id])
end
def update
@customer = Customer.find(params[:customer_id])
@product = @customer.products.find(params[:id])
if @product.update(product_params)
redirect_to root_path, notice: "#{@customer.name}様の取置商品を編集しました。"
else
render :edit
end
end
private
def product_params
params.require(:product).permit(:name, :z_code, :num, :release).merge(customer_id: @customer.id)
end
end
「new」と違って、既に作成された情報の変更を行うので
- 「@customer = Customer.find(params[:customer_id])」で親の情報
- 「@product = @customer.products.find(params[:id])」で親に関連づいた子供の情報
をそれぞれ定義しています。
3-2.遷移先の記述。間違いはどこでしょう。
ここで止まっちゃいました。
最初はapp/vews/products/index.html.erbに
<ul>
<% @products.each do |product| %>
<li>
<%= link_to edit_customer_product_path(@customer, @customer.products.ids), method: :get do %>
<%= product.name%>
<%= product.num %>
<%= l product.created_at %>
<% end %>
</li>
<% end %>
</ul>
って書いちゃったんですよね。
で、遷移もしてくれるのです。ただし、必ず同じ商品の情報編集画面へ。
これに気づかず出来たと勘違いして他の実装をしていたのです。
3〜4日経過して、他の件で商品情報を変更しようと思った時に
やらかした事に気づきました・・・
さて問題です。やらかした記述はどこでしょう。
3-3.答え合わせ。
正解は・・・
<ul>
<% @products.each do |product| %>
<li>
<div class='customer_index_list'>
<%= link_to edit_customer_product_path(@customer, product.id), method: :get do %>
<%= product.name%>
<%= product.num %>
<%= l product.created_at %>
<% end %>
</li>
<% end %>
</ul>
「@customer.products.ids」じゃなくて「product.id」でした!
まあ、ぶっちゃけそうですよね。
「@products.each do |product| 〜 end」の中にあるんだから。
「URI Pattern」 にもそう書いてあるし。

と言う訳で、無事に編集機能も実装する事が出来ました。
4.教訓
4-1今回の教訓は・・・。
- 落ち着け。
- よく見ろ。
ですかね。
CSVのインポート機能とか今までにした事ない機能を実装した後だったので
「通常の書き方と違ったりするの?」と一人でハラハラしていましたが
蓋を開けてみたら、ただの勘違いだったと。
4-2.プログラミングは面白い
変な話ですが、プログラミングって面白いですよね。
書き方一つ間違えると、もう、動かない。
誰が間違えている訳じゃない。自分自身の記述方法が間違えている。
他に責任を転嫁する事なく
「仮説」を立てて
「トライ&エラー」を繰り返し
「正解にたどり着く」
正解にたどり着いたときは嬉しいのなんの!
正直、歩みは遅いと思うのですが少しずつでも前に進んで行けたらなって思います!